Claude Desktop and OAuth
4 minute read
Overview
In order for OAuth to work for an MCP client, the client needs to know how to contact Looker, initiate the OAuth PKCE flow, and get a valid token. That token can then be used in the Authorization header in requests to MCP Toolbox. MCP Toolbox will then use that token when sending API requests to Looker.
Claude Desktop does not support as many configuration options as Gemini CLI, so the methods for setting up Gemini CLI will not work. Instead, a new feature was needed in MCP Toolbox.
One of the ways that a server can communicate its OAuth requirements is by
providing a document called “OAuth Protected Resource Metadata” (PRM) defined
by RFC 9728. A server that supports PRM will respond to a HTTP GET request from
the client to the location /.well-known/oauth-protected-resource with a json
document that specifies the authorization servers to be used and the scopes that
are required for the OAuth authorization. The client can then start the OAuth
flow.
MCP Toolbox recently added support for specifying a PRM file and will serve that GET request. This is needed to make OAuth from Claude Desktop work properly.
Configure and Deploy MCP Toolbox
For an MCP Server to work with Claude Desktop, it must be accessed via HTTPS. The MCP Toolbox in server mode only supports HTTP. Therefore it must be deployed with a “reverse proxy” of some sort that receives the HTTPS messages, terminates the SSL, then forwards the message as HTTP. Responses are sent via HTTP to the proxy and are then sent to the client via HTTPS. This is a common pattern in the networking world and should not be difficult to set up. Google Cloud Run, for example, does this automatically.
The toolbox should be run with the following environment variables set.
https://looker.example.comshould be substituted with the URL of your Looker server.LOOKER_BASE_URL=https://looker.example.comLOOKER_USE_CLIENT_OAUTH=true
The toolbox should be run with the following command line options:
--prebuilt=looker,looker-dev--mcp-prm-file=prm.json
The
--mcp-prm-file=setting is used to point to a json file with the settings that should be used for this case. The file should look like this:{ "resource": "https://looker-mcp-toolbox.example.com/mcp", "authorization_servers": ["https://looker.example.com"], "scopes_supported": ["cors_api"] }The “resource” field will be the URL of the reverse proxy server with
/mcpadded to the end. The “authorization_servers” field will be an array with one element, the Looker URL, the same value asLOOKER_BASE_URLabove. The “scopes_supported” will also be an array with one element. That element is always “cors_api”.Additionally, depending how the reverse proxy is set up, the following options might be useful:
--address=0.0.0.0--port=8080
MCP Toolbox normally listens on 127.0.0.1 port 5000. If the reverse proxy is on another host, you will need to use
--address=0.0.0.0to indicate that it should bind to all ip addresses. The--port=setting is used if you need to use a listening port other than 5000. Google Cloud Run, for example, automatically forwards external traffic from port 443, the HTTPS port, to 8080.Deploy the toolbox and check that navigating to the proxy server url with the path
/.well-known/oauth-protected-resource. You should see the contents of your PRM file in the browser.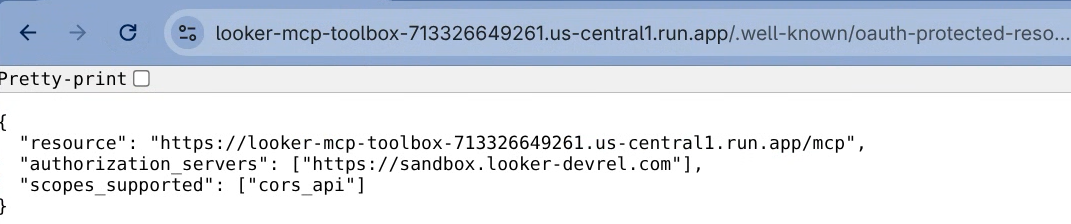
Tip
Be sure to look at the Toolbox CLI Reference, specifically the subsection on “Hardening Toolbox” for security recommendations. You may want to specify additional settings.
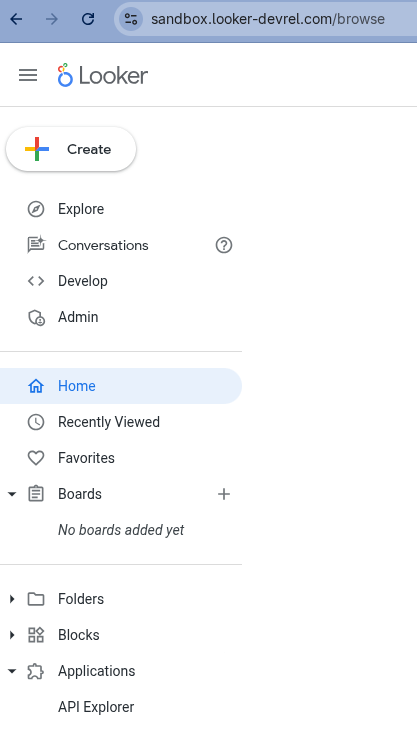
Register the OAuth App in Looker
In Looker, go to “Applications” at the bottom of the list on the left side and then select the “API Explorer”.
On the left hand side, expand the “Auth” heading and choose “Register OAuth App”. Choose “Run It” from the top right. You will see this screen.
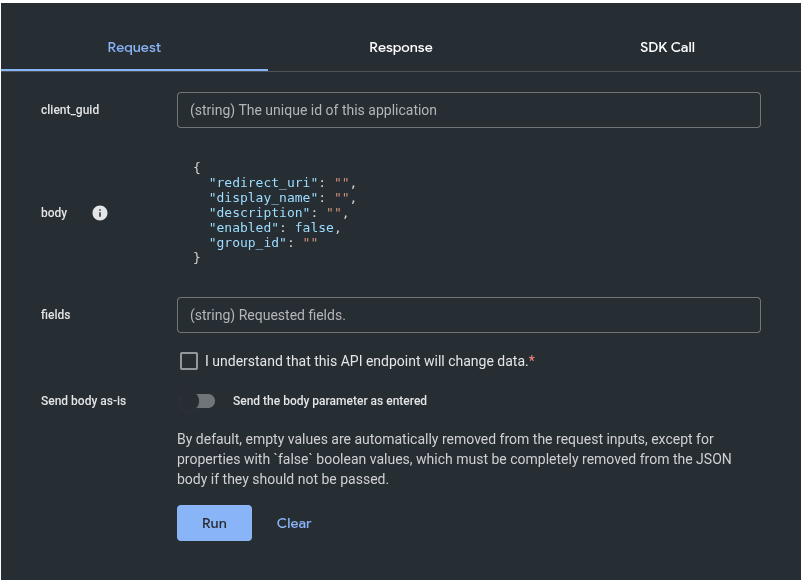
For client_guid, enter the string
claude-desktop.For the body, enter the following text:
{
  "redirect_uri": "https://claude.ai/api/mcp/auth_callback",
  "display_name": "Claude Desktop",
  "description": "Claude Desktop",
  "enabled": true
}
Check the box next to “I understand that this API endpoint will change data.” You should see this:
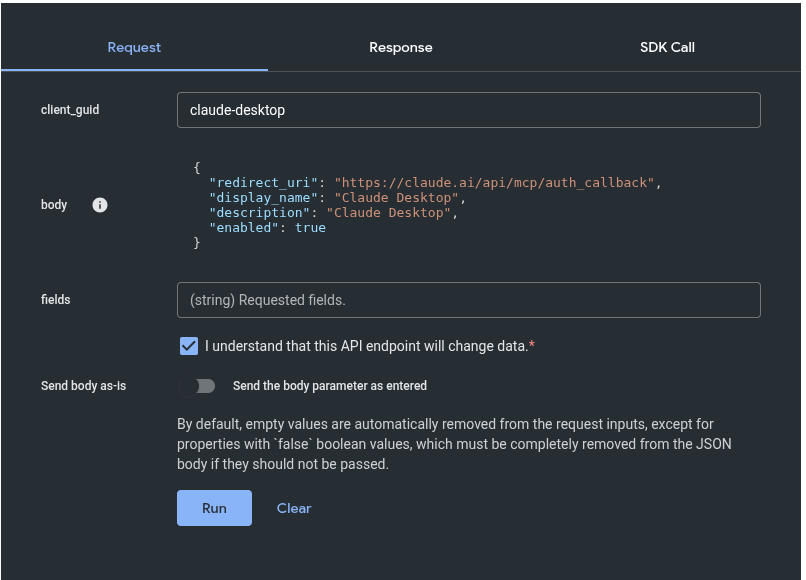
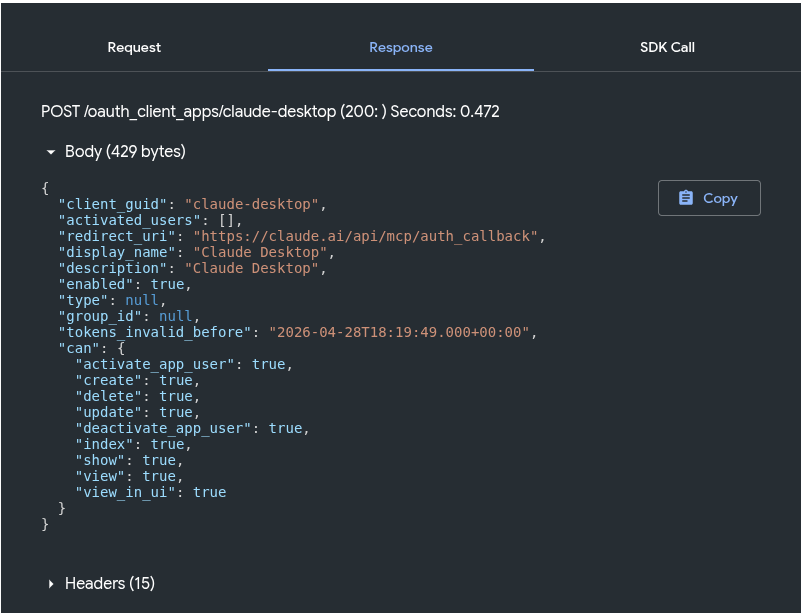
Now click the run button. Your response will look like this:
Configuring Claude Desktop
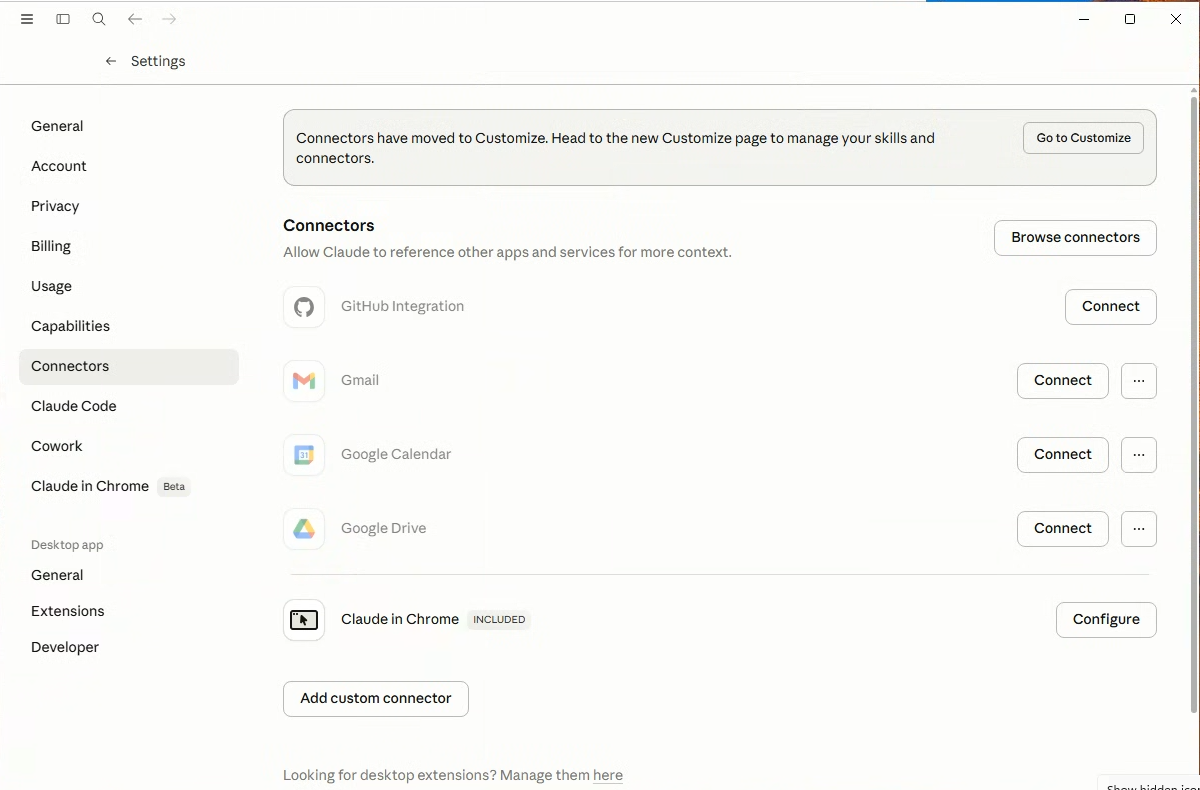
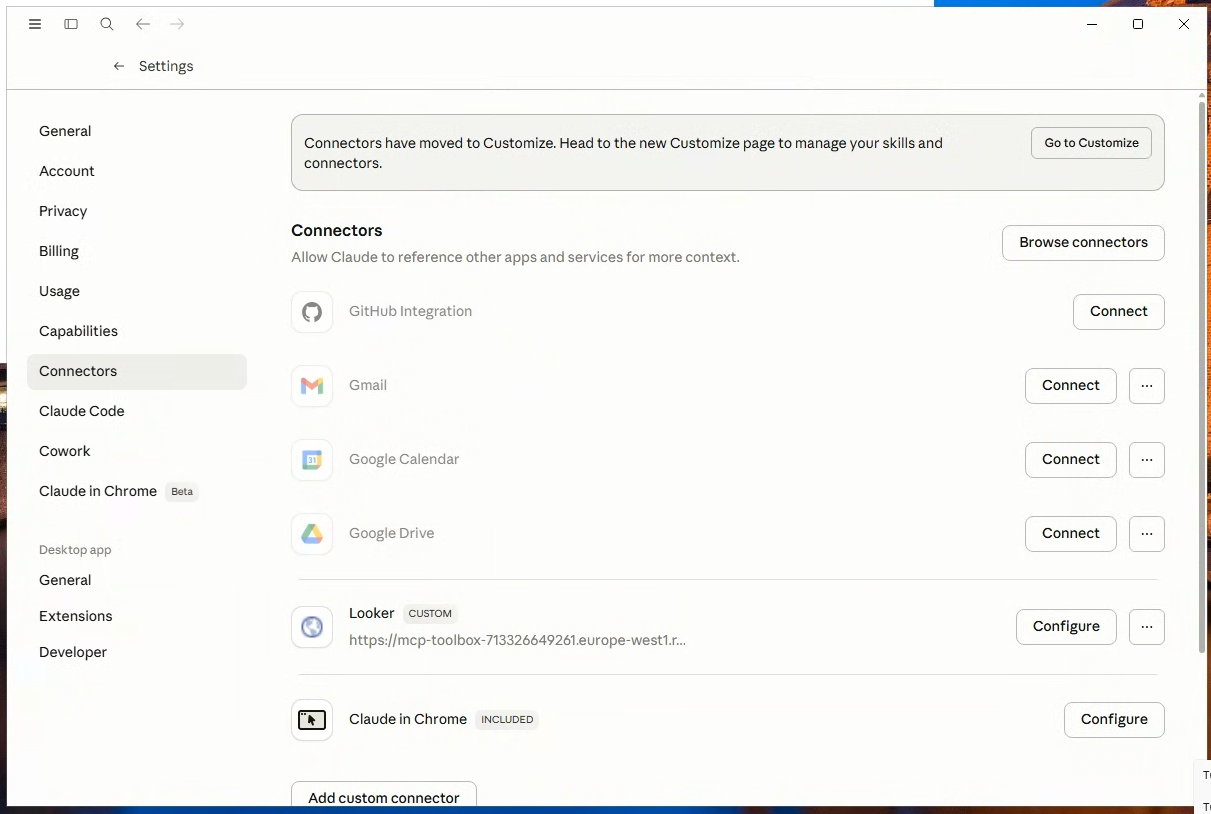
In Claude Desktop, go to Settings, then Connectors. You should see a page like this:
Choose “Add custom connector”. Enter a name like “Looker”. For the URL use the URL of the reverse proxy server with the path
/mcpadded to it.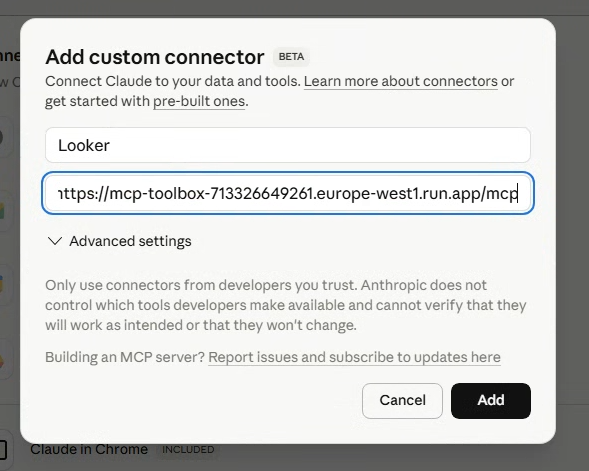
Open “Advanced settings”. Enter
claude-desktopas the OAuth Client Id. This is the client_guid we registered in Looker. Leave the OAuth Client Secret blank.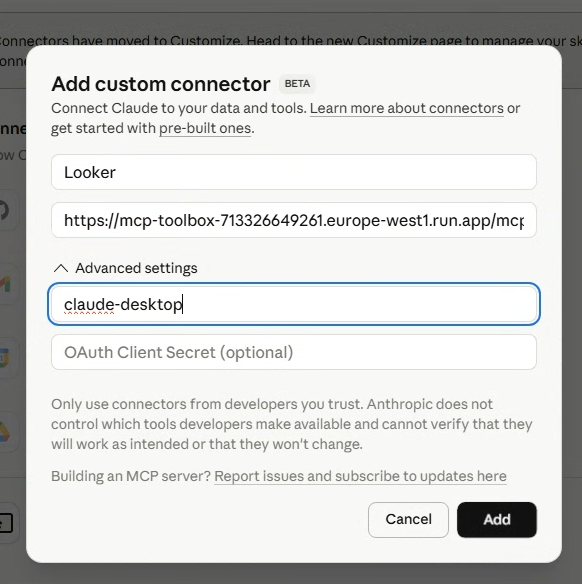
Now click “Add”. Looker will show up under the list of connectors.
When you connect to Looker, Claude Desktop will initiate the PKCE Authentication flow with Looker in your browser.
Feedback
Was this page helpful?
Glad to hear it! Please tell us how we can improve.
Sorry to hear that. Please tell us how we can improve.